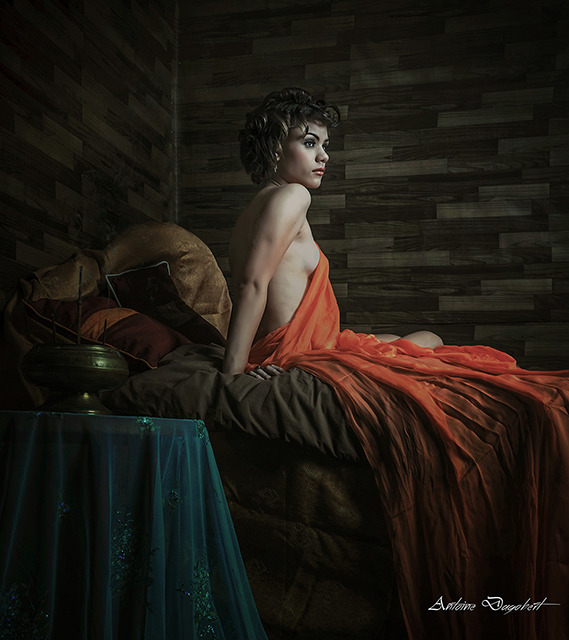
Sheherazade (a role figure in the story of 1001 Arabian Nights)
This Assignment was requested by Author and Founder, Owner and Senior Editor at Din Dragoste Pentru artăher Rumania Liliana Negoi
She approached me to make a cover of her new book that will be released at that time
I was honored and humbled that she was chosen me amongst many.
1. Setting up the background...
I am using 2 wooden boards and wall papers.. The colors that I choose dark brown, cyan, red and orange as the basic of colors of this image to create moody ambiance that should goes along and in line with the story itself. Big thanks and Thumbs up to my creative team after 5 days working on it we were able to set up these moody dark ambiance. other properties a bed, pillows, round table etc ( see image).
2. Lighting set up.....
see diagram below....The role of the lighting here is to emphasize the ambiance, give more accents and soul to the dark moody ambiance and colors. I used 1x times 600 watt Profoto with 3x4 soft box with ¾ almost full power diagonally above the model and gold reflector on the other side to receive and bounce the light into direction of the model.I am not worry for overexpose with ND 8 filter attach on my lens :D

3. Camera
I am using Nikon D3 with lens 17-55mm F 2.8. Its DX format lens on the FX body? There is a reason for it, first reason: that's the only wide lens I had at that time (I could not effort the expensive 24-70mm F2.8). Second reason: I love vignette effect of it, so why not?
The other thing is I am using ND 8 filter to emphasize painting tonal quality and firm contrast.
I set my exposure on 1/160sec, aperture on F10 and ISO in 100.
4 Post Production
Using CS6 open file first in Camera RAW… due using ND 8 filter adjustment that highly recommended especially on black opacity, Contrast and Shadow. After that I open the file in CS 6 further adjustment are curves, dodge and burn, Hue and saturation, adjust the vignette using the lens correction option and last using the Un-sharp mask filter to gain sharpness and push up the contrast a bit more.
So, I am happy with the result
Hope you guys enjoy the image as much as I do
Cheers
Antoine Dagobert
All The Materials Contained May Not Be Reproduced, Copied, Edited, Published, Transmitted Or Uploaded In Any Way Without My Permission. My Images Do Not Belong To The Public Domain.
© Antoine Dagobert: using this image for any purpose and in any way, without prior permission, may lead to legal action.
#swag #zizzleblog #girly #fashionable #rings #boho #hot #bohemian #clubsocial #swagger #pants #lbloggers #fashionlove #fashionfollow #stylehunter #fashiondesign #trendhunter #britstyle #dailyoutfit #fashionweek #wiwt #britishstyle #longhair #fashionpic
No comments:
Post a Comment